
Chromium 6 Water Test: The Test With No Federal Limit
Your well report says chromium is under the limit, and
Free Shipping on Orders of $100 or More
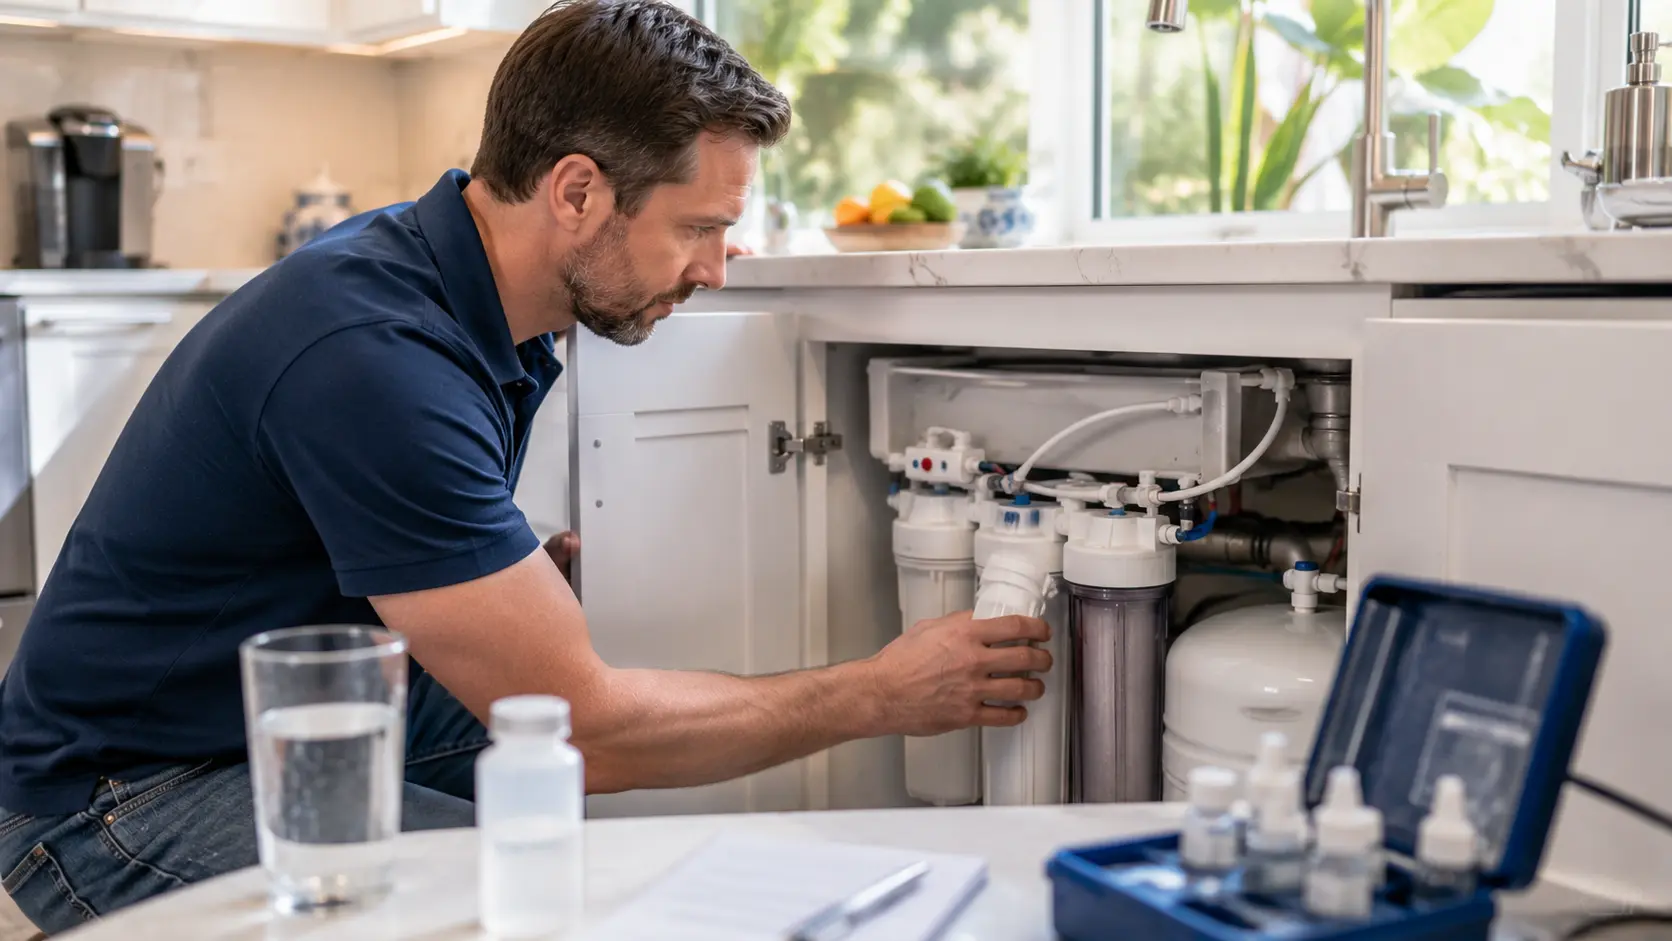
Your filter is installed, the indicator light is green, and the water tastes the same as always. That is not proof. The way to know is a paired sample. Get one from the tap ahead of treatment, one from the treated tap, and a lab runs both for the same contaminants. Read the two reports side by side, and you see what the filter removed and what it left behind.
Carbon filters give you one honest warning. When the media is spent, chlorine taste and smell come back, because chlorine is among the first things carbon holds and among the first it releases. That signal is real. It is also the only one you get. Lead, PFAS, arsenic, and nitrate carry no taste, no color, and no odor at levels that matter to health. Water that tastes clean can carry all four.
Before you touch the hardware, name the thing you want gone. Chlorine, lead, PFAS, nitrate, hardness, sediment, and bacteria each call for different treatment. Then ask the narrower question: is this filter built and certified for that contaminant? A sediment cartridge doing its job perfectly leaves nitrate exactly where it started. Working means one answer per contaminant.
The model number is printed on the filter housing, stamped into the cartridge, or listed on an appliance label. For built-in systems, check the manual or the installer’s paperwork. Search that number for the manufacturer’s performance data sheet. It names the contaminants the system claims to reduce, the rated capacity in gallons, the flow conditions behind those claims, and the replacement interval. That sheet becomes your benchmark.
An NSF logo on a box answers nothing by itself. Certification always attaches to named reduction claims, so read the claim rather than the badge. In broad terms, NSF/ANSI 42 covers aesthetic effects such as chlorine taste and odor. NSF/ANSI 53 covers named health-related reductions. NSF/ANSI 58 applies to reverse osmosis systems. More on reading those numbers further down.
Buying a house often means inheriting treatment equipment nobody explained. Start at the housing. Photograph the label, the cartridge, and the plumbing around it, then look up the brand and model. A tall canister near the main line is usually sediment or carbon. A small tank with its own little faucet at the sink is reverse osmosis. Ask the seller or the listing agent for service records while you still can.
Three checks take ten minutes. Look for a date written on the cartridge or a sticker on the housing, since installers often mark the change date there. Look for maintenance receipts, a service tag, or a contractor’s name on the unit. Then find any bypass valve and confirm it sits in the filtering position. When the history comes back blank, replace the cartridge and start a fresh baseline.
Different systems treat different parts of the plumbing. An under-sink unit treats one faucet. A refrigerator cartridge treats the dispenser and the ice maker. A point-of-entry system treats everything past the meter. Reverse osmosis usually feeds one dedicated spout, not the main kitchen tap beside it. Trace the pipe and write down which taps sit downstream. Sampling a bathroom sink and blaming the kitchen filter is a common mistake.
With the basics sorted, here’s where things get specific. Use this as a scope check rather than a product review, since coverage varies by model inside every category. Confirm your own model against its data sheet before you assume anything.
Filter claims are reduction claims. A certified product has been tested to lower a named contaminant by a set amount. That test runs under set laboratory conditions, at a stated flow and up to a stated capacity. That differs from a promise of zero. A claim may read as a percent reduction or as a treated-water level the product must stay under. Keep that number handy, because your own report gets compared against it later.
Match the check to the technology. Reverse osmosis can be tracked between lab tests by comparing feed and product readings on a handheld meter. A softener is checked with a hardness result before and after the unit. UV needs lamp hours, a working status alarm, and microbiological testing, since treated and untreated water look identical. Sediment cartridges are watched through falling flow and a widening psi gap across the housing.
The signs of a water filter not working are easy to miss, since half of them look like small household annoyances. Read each one for what it proves and what it only hints at. None of them replaces a lab result. They tell you when to order one.
You notice a pool-water smell at a tap that had none last month. The carbon has taken on all it can hold and is passing chlorine straight through. This is the earliest honest signal a carbon filter gives, and it shows up long before you could sense a lead or PFAS problem.
Action: replace the cartridge now, then test if health contaminants are in play.
The faucet slowed, and filling a pot takes noticeably longer. Sediment has loaded the cartridge and is restricting the path through it. That tells you the filter is catching particles, which is useful, and it says nothing about dissolved contaminants. A carbon block can be completely spent for lead while still flowing just fine. Our piece on why filters clog sooner than expected digs into what usually causes this.
Action: change cartridges on rated capacity, not on how the stream looks.
Manufacturers rate cartridges in gallons, then translate that figure into months for an average household. A family of five reaches the same gallon count far sooner than one person does. Count people, count refills, estimate use.
Action: track gallons alongside the calendar and change on whichever number you hit first. Reminder lights usually run on elapsed time or a flow counter, not on measured performance.
Grey haze or fine black specks in a glass point to two failures. Media breakthrough sends spent carbon fines into the treated water. Channeling means flow has cut a path through the bed and skips most of the media. Both look cosmetic. Both mean water is passing through with almost no contact.
Action: replace the cartridge and retest, since a channeled filter can read like untreated water.
You installed reverse osmosis, held a handheld meter to both lines, and the numbers matched. On an RO system, that is a real red flag. A working membrane rejects a large share of dissolved solids, so feed and product readings should differ clearly. Matching numbers point to a bypassed line, a failed membrane, or a loose fitting.
Action: call the installer, then confirm with a lab panel.
Your report reads the same on both sides, and no sign above the fits. Look at the plumbing. Bypass valves get left open after service. Cartridges get seated crooked and let water slip around the media. Systems get plumbed onto the wrong line, so the treated pipe feeds a hose bib instead of the kitchen.
Action: verify the flow path and the cartridge seat before you blame the media.
Larger systems often carry gauges on both sides of the housing. Note the psi gap between them when a cartridge is fresh, then watch it widen. A growing gap on a whole-house filter means the cartridge is loading up or flow is restricted. Those gauges measure hydraulic resistance, not removal. They help you time maintenance. They tell you nothing about lead, PFAS, or nitrate.
Vacation homes, seasonal cabins, newly bought houses, and systems idled through a renovation all sit stagnant. Standing water inside a cartridge or tank can support bacterial growth, and media condition after months offline is unknown. Action: read the manufacturer’s restart instructions, replace cartridges as directed, and flush the system fully. Where bacteria or treatment performance matter, set a new baseline after the restart.
Before you spend money proving anything, spend ten minutes here first. A lab report can’t fix an open bypass valve, and you’ll have paid to learn that the hard way.
These checks show the equipment is operating. The paired lab test below shows it is reducing the contaminants you care about.
Once the hardware checks out, here’s the part that actually settles the question. One order, two samples, two reports. That’s the entire method.
Same day matters. Source water shifts with rainfall, hydrant flushing, and seasonal change, so a week between samples lets the source explain the difference instead of the filter.
Test for what the filter claims to reduce, plus anything your household worries about. An inherited system with no paperwork is the case for a broad panel, since you are learning the water and the equipment at once. Verifying a single lead, PFAS, nitrate, or hardness claim calls for a targeted paired test. Both samples need the same parameters, the same methods, and the same reporting limits.
Keep everything constant except the filter. Collect both samples within the same hour, if you can. Use a true pre-treatment point, such as an outdoor spigot ahead of the system or a sample port on the inlet. Flush each line the way the lab instructs, for the same length of time. Samples pulled on different days from unrelated faucets are two snapshots, not a comparison.
Run the paired test while the system is new or freshly serviced. That gives you two numbers worth keeping: what the untreated water carries, and what this system does on a good day. Every later result gets measured against your own baseline instead of a printed claim. Ready to set yours? ETR Laboratories can supply a paired kit built around the parameters that matter in your home.
With both reports in hand, here’s how to actually read them. Read across, not down. Each parameter carries six pieces of information, and the comparison that matters lives in the last two.
Watch for partial success. A result that fell by half and still sits above the level the model promises means the filter is working and underperforming at the same time.
The math is short. Subtract the post-filter result from the pre-filter result, divide by the pre-filter result, then multiply by 100. Say an example lead result came back at 10 parts per billion before the filter and 2 after. Ten minus two, divided by ten, times 100 gives 80 percent. Percent reduction only means something when the pre-filter number sat well above the reporting limit.
Now set your percentage next to the model’s published claim. Reduction in line with that claim means the system is doing its job in your water. A materially weaker result sends you into troubleshooting: installation, cartridge age, gallons used, flow rate and water chemistry all change the outcome. Work through them one at a time instead of assuming the media or membrane failed.
Non-detect means the lab did not measure the contaminant at or above its reporting limit in that sample. It is strong evidence when the same contaminant was clearly present before treatment. It still is not zero, and honest reporting keeps that line clear. Ask for the reporting limit beside every non-detect, since a high limit and a clean result can look alike on paper.
Identical numbers on both sides feel like a failed filter right away. Sometimes they are. Before you jump to that conclusion, work through this list in order.
Fix the one problem you find, then retest. Changing three things at once puts you right back to guessing.
A filter cannot show a large reduction on something that was barely there. If the pre-filter lead result sat near the reporting limit, the post-filter result has nowhere to fall. This is why the unfiltered sample matters so much. Without it, a low treated number tells you the water is fine and tells you nothing about how much work the filter did.
Sediment cartridges catch particles. Softeners trade calcium and magnesium for sodium. UV inactivates organisms. Carbon adsorbs chlorine and many organic compounds. Each one can be in perfect health while a parameter outside its scope reads the same on both sides. Cross-check the result against the product’s verified claims before deciding the equipment failed. Scope mismatches are far more common than broken hardware.
Media does not last forever. Carbon reaches capacity, resin loses exchange sites, and RO membranes foul with scale and biofilm. A weak reduction on a cartridge past its rated gallons is a service finding rather than a mystery. Line the report up against your service history and the rated capacity. Replace what is due, then retest when the contaminant is one you need confirmed.
Since certification came up more than once already, it’s worth spelling out what those numbers actually mean. Our full explainer on what NSF certification means and why it matters goes deeper, but here’s the short version. NSF/ANSI 42 covers aesthetic effects: chlorine taste and odor, plus particulates by size class. It makes no health claim at all. NSF/ANSI 53 covers health-related reductions, and only the ones the product was actually tested for, so a lead claim says nothing about arsenic.
NSF/ANSI 58 applies to reverse osmosis systems, with its own tested reduction list and its own daily production rating. NSF/ANSI 401 covers incidental compounds, including some pharmaceuticals and pesticides. A certification always names specific contaminants, never water in general. PFAS claims sit under their own standard, which our companion guide on water filters that remove PFAS walks through in detail.
Search the certification listing by manufacturer and model number, exactly as printed on your unit. Product families share names and split claims. Two refrigerator cartridges in one series can carry different tested reductions, and retail box copy often describes the family rather than the part in your hand. If your model does not appear under the claim you need, treat that claim as unverified.
Certification answers what the product did in a lab, under controlled flow, set water chemistry, and a defined test cycle. Your paired samples answer what it does in your plumbing, on your water, with the cartridge age and flow you actually have. Both count as evidence. The listing says the system can perform. A post-filtration water test says it did, at your tap.
Two schedules run in parallel. Replacement follows the manufacturer. Retesting follows change.
The filter replacement schedule printed on a box is preventive maintenance built around an average home. Sediment load, household size, and source water quality all shorten real cartridge life. Keep a note on your phone with the install date and a rough gallon count, since a reminder light counts time or flow rather than measuring performance. Change on whichever trigger arrives first.
Retest when something changed. A different cartridge type, new equipment, repiping, or a water main repair. Also a switch in your utility’s source, a boil water notice, or a surprise result on an earlier report. Each of those is a reason to compare again. Testing should answer a question you can name out loud. A monthly habit with no question behind it burns money.
Partly. At home, you can check flow, taste, psi, and a handheld reading, and none of those confirms contaminant reduction. Home strips cover a narrow set of parameters with wide error bars. Proof takes a paired lab sample, one before treatment and one after, analyzed for the same parameters. The procedure above walks through the collection steps.
Only for reverse osmosis, and only partly. The reading tracks dissolved charged solids, so a carbon filter can strip chlorine and lead while the number holds steady. A steady reading is not evidence of a failed carbon filter. On RO, comparing feed and product is a useful check between lab tests, not a contaminant result.
Test once at installation to set the baseline. Test again near the halfway point of the cartridge’s rated life. Then test on any change in taste, flow, or household size. Lead and PFAS systems deserve a tighter loop, since both contaminants stay invisible and both carry health weight. Match the cadence to the risk you are managing.
Some do. Lead reduction sits under NSF/ANSI 53, and a cartridge either carries that claim or it doesn’t. Box wording like advanced filtration is marketing language, not certification. Look up your exact model number in the certification listing and read the claim list. Our deeper look at how effective refrigerator filters actually are covers why cartridges inside one product line often differ from each other.
Yes. Certification shows the product performed in a lab under controlled conditions. It cannot account for your water chemistry, your installation, your flow rate, or a cartridge three months past its rated gallons. Rated performance and installed performance are two questions, and only a sample from your own tap answers the second one.
In four steps. Identify what the filter is meant to reduce, then verify the claims for that exact model. Check the installation and the cartridge condition. Finally, compare matching pre-filter and post-filter samples for those contaminants. Taste, flow, and indicator lights help you troubleshoot hardware. They cannot verify the reduction of anything invisible.
Life depends on the technology and its rating, not on one universal number of months. Cartridge life follows rated gallons, sediment load, source water quality, and household demand. Replace at the rated capacity or the stated service interval, whichever comes first. Look earlier when flow drops, or a test shows weaker reduction than your baseline did.
The outcome depends on the type. Carbon reaches capacity and stops holding what it once adsorbed, sediment cartridges restrict flow, and neglected housings collect biofilm and grit. Some systems simply pass water through untreated. Follow the manufacturer’s replacement guidance, and verify performance by testing where a contaminant affects health decisions.
Some technologies can. UV inactivates organisms, and membrane systems rated for microbiological reduction act as a barrier when designed and maintained for it. A standard carbon cartridge is not a disinfection device. Check the microbiological claim on your own system, then confirm with bacteria testing where a well, an outage, or a repair is involved.
Certain technologies and certain rated products reduce specific PFAS compounds. The phrase water filter on its own promises nothing about PFAS performance. Check the exact model’s verified claims compound by compound, then use pre-treatment and post-treatment lab samples to see how that system handles the PFAS present in your water.
A paired baseline is a small piece of paperwork that keeps paying you back. It records what your untreated water carries, what your system removes, and what a good day looks like for that equipment. Every future result then has something real to be measured against. How to know if a water filter is working stops being a guess and becomes a comparison instead.
Order a before-and-after panel from ETR Laboratories, collect both samples on the same day, and read the two reports side by side. Not sure where to start? Browse our water tests to find the panel that matches what your filter claims to do.
Your well report says chromium is under the limit, and
A VOC kit arrives with small glass vials, a preservative
You open a water test report, or compare two test
Related Post.
Chromium 6 Water Test: The Test With No Federal Limit
Your well report says chromium is under the limit, and that may seem like the
How VOCs Are Tested in Well Water: Lab Method Explained
A VOC kit arrives with small glass vials, a preservative already inside, a no-bubble rule
Copper and Manganese: Why Some Water Tests Skip Them
You open a water test report, or compare two test kits side by side, and
Golf Course Pesticides and Your Well Water: What to Test
Field studies have found turf pesticides in some groundwater beneath golf courses, usually below health
Giardia and Cryptosporidium in Well Water: Can You Test?
After a stomach illness, a flood, or a neighbor’s warning about parasites, a passing bacteria
Uranium Water Test: The Well Test Most Owners Skip
Uranium has no color, taste, or smell, and the routine tests many well owners order
State Well Water Testing Requirements by Region: A Guide
Private well testing requirements vary by state, and your county or municipality may add rules
Inside the ETR Laboratory: How Samples Are Analyzed
Most people who order a water test never see what happens after they mail the
Home Water Filtration Systems Often Pay for Themselves. Here Is the Math.
From the Lab by ETR Laboratories Most people treat bottled water as a small household
City Water vs Well Water: Different Tests, Different Risks
City water and private well water are managed differently, so the reasons you may want
What Comes in an ETR Water Test Kit: A Full Breakdown
When your ETR Lab’s water test kit arrives, the first question is usually simple: what’s
How ETR Laboratories Tests Your Water, Step by Step
Water testing ads usually talk about the kit in your mailbox. The part that decides