Chromium 6 Water Test: The Test With No Federal Limit
Your well report says chromium is under the limit, and

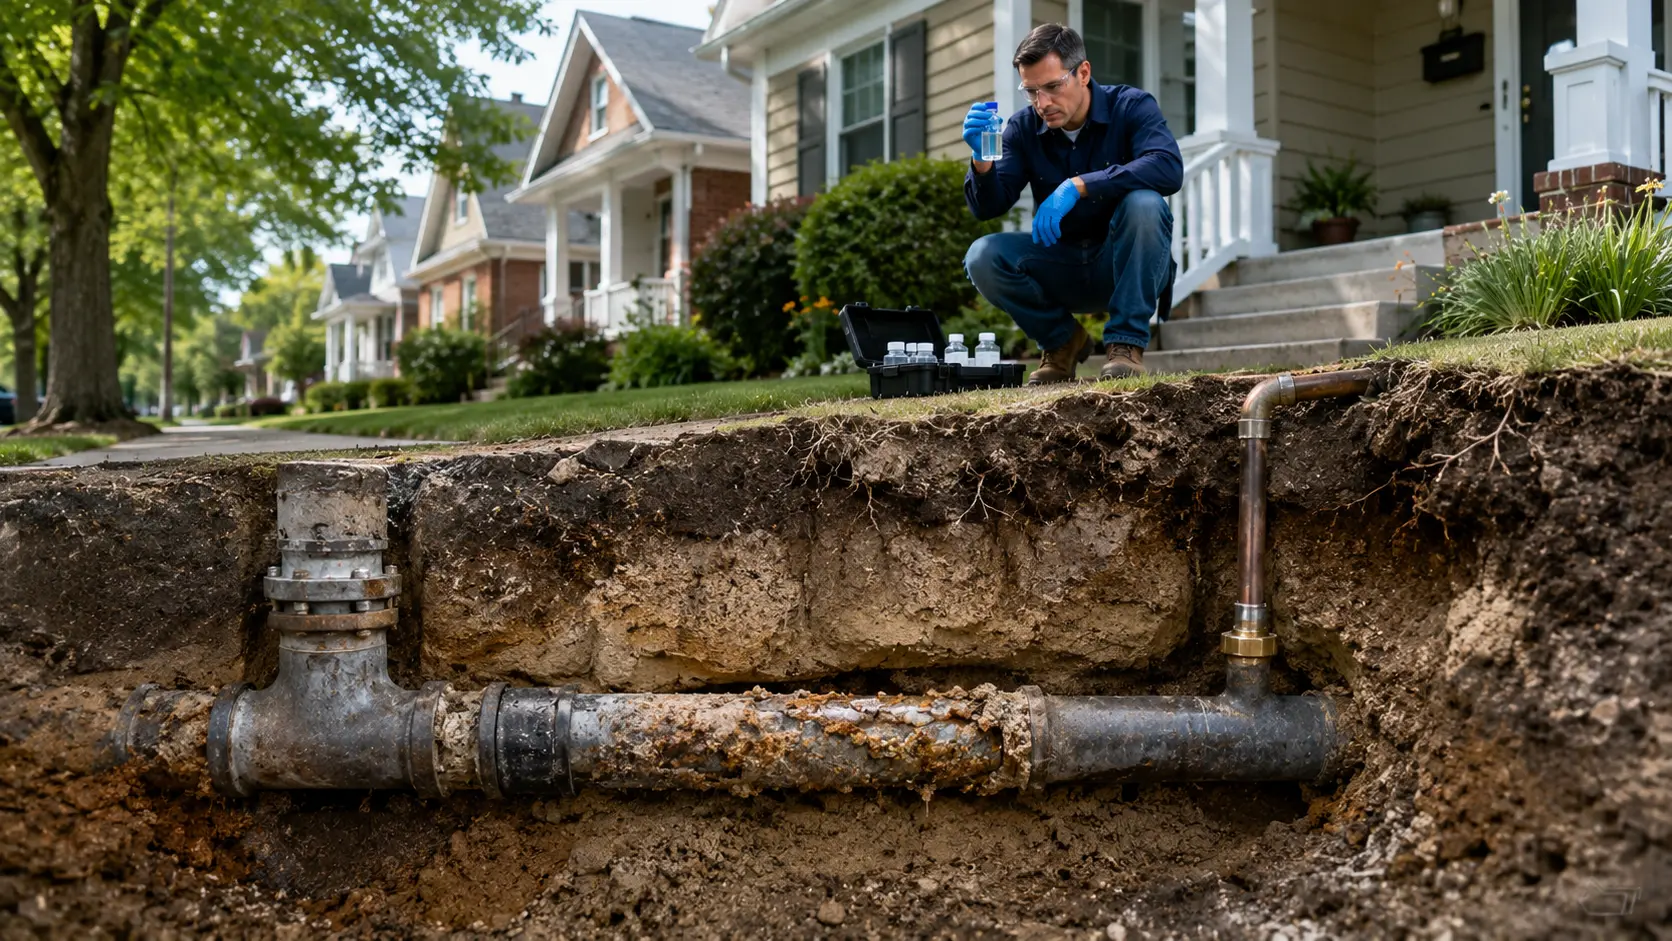
A notice from your water utility landed in the mail. It lists your pipe material as unknown. Unknown is the answer millions of households get, and it is not a verdict. It means nobody has checked yet. You can narrow it down today with a coin, a magnet, and a few records. If you already suspect a problem, our guide to signs of lead contamination can help you spot it faster.
Your service line runs from the water main under the street to your home. It ends at the meter or just inside the basement wall. Two parties usually share that pipe. The utility owns the stretch from the main to the property line, and you own the rest of it.
That split matters once replacement comes up. Swapping one half and leaving the other is called a partial replacement. Cutting into old pipe knocks loose the scale that holds lead, and levels at the tap can rise for weeks afterward. Getting both sides done in one job is the goal, and it’s the same question behind our guide on whether lead pipes are contaminating your family’s drinking water.
Before you start inspecting, know that one line can hold several materials. There is a public side, a short connector called a gooseneck or pigtail, a private side, and the visible piece entering the house.
Lead, copper, galvanized steel, and plastic can each appear in a different portion. Copper at the basement wall does not prove the buried pipe is lead-free.
Construction date is the fastest screening clue you have. Federal law banned new lead pipe and lead solder for drinking water in 1986. A lead service line was standard equipment in many cities for decades before that, so older neighborhoods carry the highest odds.
A build year alone proves nothing. A house rebuilt in 2005 can still sit on a pipe installed in 1925. Ask your utility when the property first received water service, and pull any renovation or replacement history you can find. Homes connected after the lead ban are less likely to have lead, and that is a probability, not a clearance.

Work through these in order. Each one hands you a piece of the answer, and together they usually settle it. None of them require cutting the pipe or digging up the yard.
Find the pipe where it enters your home, near the meter or the main shutoff. Scrape a small spot with a coin or a key. Then hold a magnet against the bare metal.
Dull gray metal that turns shiny silver and ignores the magnet points to lead. A penny brown tone means copper. A magnet that grips firmly means galvanized steel. Next step: photograph the scratched spot and write down what you saw. These are the same identification methods utilities and lead service line advocacy groups use themselves.
Galvanized steel earns a second look. If it once sat downstream of lead pipe, its inner scale can still hold lead and release it. More on that below.
Community water systems had to build a service line inventory and publish it under federal rules, following EPA’s inventory guidance. Search your provider’s website, or call and give them your address. You will see lead, non-lead, galvanized requiring replacement, or unknown.
Unknown entries are common, and in some systems they cover a large share of addresses. Next step: save a dated screenshot of your record before you go looking at the pipe.
Look where the line comes through the floor or the wall, usually within a few feet of the meter. Brush off dust and loose paint on a small section. A rounded, swollen joint near the shutoff valve is a lead-wipe joint, and it is a strong clue. Next step: check both sides of the meter, since materials often change right there.
Paper beats guesswork. Plumbing permits sit with your city or county building department, often searchable online by address. Your utility keeps replacement records, and the seller’s disclosure from your purchase may name the pipe.
A permit for a service line replacement is the cleanest proof the pipe is no longer lead. Next step: request the full permit history for your address in writing.
Pipe material predicts risk. A water test measures it. A first draw sample, drawn after the water has sat still for several hours, captures what the pipe gave up overnight.
See how to test for lead in water to get the right instructions. Before you order, our guide on important things to know before testing for lead can help you avoid a wasted sample. ETR’s lead and copper panel reports both metals from one first draw sample. Next step: order the test and follow the sampling instructions exactly as written.
Pick a clean, unpainted section near the main shutoff. Lead reads dull gray at rest, and brighter silver once scraped. Copper shows its familiar brown penny tone. Galvanized steel looks gray and feels much harder underneath.
Plastic lines are usually white, gray, blue, or black. Paint, wrapping, corrosion, and mineral deposits all fool the eye, so treat sight alone as a hint. Next step: wipe a small area clean before you judge any color.
Softness is a real diagnostic clue. Lead gives way under a coin or key and shows shiny silver right away. Galvanized steel resists and keeps its dull gray face. Copper scratches to a pink-orange shine.
Do not cut deeply, puncture, or gouge the pipe. A leak on the buried side becomes your problem quickly. Next step: scrape gently, then stop the moment fresh metal appears.
Lead pipe was joined with wiped solder, which leaves a rounded bulge where two sections meet. Look near the valve and at the meter for a swollen collar wider than the pipe itself.
Seeing one supports a lead identification. Seeing none proves nothing, since the joint may be buried or already gone.
Photos let someone else check your work. Take a wide shot showing where the line enters. Then shoot close-ups of the metal, the connection, the valve, and your scratch spot.
Ask your provider if it accepts homeowner photos for material verification or record updates. Many do, and your listing can be corrected without a site visit. Next step: email the photos with your address and account number.
When records, sight, and utility data still disagree, expose the pipe. Utilities and licensed contractors open a small hole at a strategic point, often the curb stop, using potholing, hand digging, or hydrovac. You do not need the whole run uncovered to name the material.
Do not dig around buried utilities yourself. Gas, electric, and telecom lines share that ground. Next step: ask who performs verification digs in your area and what the work costs.
Conflicts are normal, and they have ordinary causes. The indoor segment may have been swapped decades ago while lead stayed underground. Public and private halves can differ. Records go missing, and old jobs sometimes replaced only part of the run.
One copper pipe at the basement wall does not clear the entire run.
No. A laboratory result tells you how much lead sat in that sample under those conditions. It cannot name the material of every buried foot of pipe.
The reverse holds too. Finding lead pipe identifies a source without telling you the concentration at your kitchen faucet. Two different questions, two different methods, and you want both answered.
Lead release moves around. Stagnation time, recent water use, corrosion control chemistry, temperature, and any recent disturbance all shift the number. A single low sample from a confirmed lead pipe is a snapshot, not a guarantee. Retest after plumbing work, and sample again if your utility changes treatment.

Home screening kits have a narrow use. They can flag an obvious problem cheaply, and for a first look that is fine. A properly collected sample analyzed by a certified laboratory returns a concentration you can compare against EPA guidance.
Keep the two questions apart. A swab kit checks the metal in front of you. A water test checks the water you drink.
The EPA’s Lead and Copper Rule Improvements reset the ground rules for utilities. Systems must keep a public inventory of pipe materials, notify customers whose line is lead or unknown, and replace lead lines on a schedule.
Replacement runs against a federal deadline years out, with limited extensions for the hardest systems. Required annual replacement rates and end dates have shifted with rulemaking and litigation.
Unknown means unverified. The utility has not gathered enough evidence to classify your pipe, and that is a records gap rather than a finding. Treat it as a starting point and work the methods above.
Utilities usually want your photos, the age of the home, any plumbing permits, and the material visible at the meter. Send all four, and the entry can change.
Ask what the classification rests on. Replacement documentation and a verified visual inspection are strong evidence. A prediction built from construction dates is weaker, and older properties get miscoded that way.
Compare the record against what you can see on the private side. If the two disagree, say so in writing and request verification.
Filtered water is too vague a phrase to rely on. Look for a device certified for lead reduction, then follow its cartridge schedule, flow limits, and setup instructions. A skipped cartridge change turns protection into decoration.
Filtration lowers exposure while you wait your turn. It is not a reason to leave a confirmed lead pipe in the ground permanently.
Start with cold water for drinking, cooking, and infant formula. Hot tap water pulls more lead out of pipe and solder, and the heater carries its own sediment history. Fill the kettle or pot from the cold tap and heat it on the stove. That costs nothing and closes an easy exposure route.
Meter swaps, repairs, street work, and partial replacements shake loose lead-bearing scale and particles. Follow your utility’s flushing instructions afterward, which usually means running cold taps for several minutes.
Keep the certified filter in place through the recommended period. Then test again once things settle, so you know where you actually stand.
Lead pipe replacement cost swings with length, depth, surface type, and local labor rates. Published ranges span a few thousand dollars to well past ten thousand on a long or awkward run. Trenchless methods trim restoration work and often the total bill.
You may pay nothing at all. Federal infrastructure money and state revolving loan funds flow to utilities for this work, and many programs cover the private side too. Cost sharing, income-based waivers, and full coverage all exist, and eligibility is set locally.
Call your water provider before you call a contractor. Ask what the program covers, who qualifies, which contractors are approved, and what you would owe. Ask directly if the work includes both the public and private portions. Arranging your half alone can leave you with a partial replacement and a temporary lead spike.
Galvanized steel that once sat downstream of lead pipe is the quiet problem here. Lead particles from upstream embed in the zinc scale lining the inside wall. That scale keeps releasing lead for years after the lead pipe itself is gone.
Federal rules classify this pipe as galvanized, requiring replacement when lead was ever upstream of it. Ask your utility how yours is coded, since the label decides your place in the replacement queue.
A magnet that sticks rules out lead in that section. It does not close the case. Ask the utility about any lead gooseneck or lead public side upstream. Ask how the pipe is coded today. Replacement history matters as much as the metal in your hand.
Scratch the pipe near the meter with a coin, then hold a magnet against it. Dull gray metal turning shiny silver with no magnetic pull points to lead; penny brown means copper, and a gripping magnet means galvanized steel. Work through the ten methods above before you settle, since one section rarely tells the whole story.
New lead pipes and lead solder were banned for drinking water in 1986, and existing installations were allowed to stay. That is why so many remain in the ground. Federal rules now require utilities to inventory and replace them on a schedule.
No. Utilities add corrosion control chemicals that build a protective mineral scale inside the pipe, which slows lead from dissolving. That scale breaks down when water chemistry shifts or the pipe gets disturbed. EPA and CDC report no safe level of lead exposure for children, so testing is the only way to learn your number.
Ownership usually splits at the property line. The utility owns the pipe from the main to that boundary, and you own the section running to the house. Many utilities now fund the full replacement with federal and state money, private side included. Ask your provider directly what it covers at your address.
You can, and it may raise lead levels for weeks. Cutting the pipe disturbs the scale, and new copper joined to old lead creates galvanic contact that speeds lead release. Coordinate with the utility so both halves come out in one job. If you must go first, filter and flush afterward.
The digging and connection usually take a day or two per property. Scheduling, permits, and utility coordination stretch the calendar to weeks or months. Trenchless pulling shortens the disruption and the yard repair. Plan on flushing your plumbing afterward, plus a follow-up water test once the new line is in service.
Yes, with a caveat. At-home screening kits give a rough reading, useful for a first look. A sample you collect and send to a certified laboratory returns an actual concentration when you follow the collection steps. Neither one identifies the buried pipe material, so pair any test with the physical checks above.
No single clue covers a buried pipe end to end. The strongest answer combines utility and permit records with hands-on verification of every accessible section. When the material stays unknown, targeted exposure at the curb stop settles it. Water testing answers the separate question of how much lead reaches your tap.
No. Vinegar does not reliably identify lead pipe, and improvised chemical tests on plumbing can mislead you badly. Stick with what works: clean the pipe and look at it, scratch and magnet it, pull your records, and ask the utility to verify. Professional exposure of the buried section is the final word.
Yes. Older solder joints, brass fittings, faucets, and valves can all add lead, even on a copper or plastic line. Lead pipes in home plumbing have turned up in some regions as well.
Certainty arrives in two steps. Identify the pipe, then measure what comes out of it. The utility record tells you what is buried in the yard. A laboratory result tells you what went into the coffee this morning. One without the other leaves you guessing.
ETR Laboratories has tested drinking water since 1995, independent of any utility or contractor. If your line came back lead or unknown, order a first-draw lead test and get a number you can act on. Once results arrive, our guide to reading a water test report walks you through what each line means. Browse our water tests to get started.