
How VOCs Are Tested in Well Water: Lab Method Explained
A VOC kit arrives with small glass vials, a preservative
Free Shipping on Orders of $100 or More
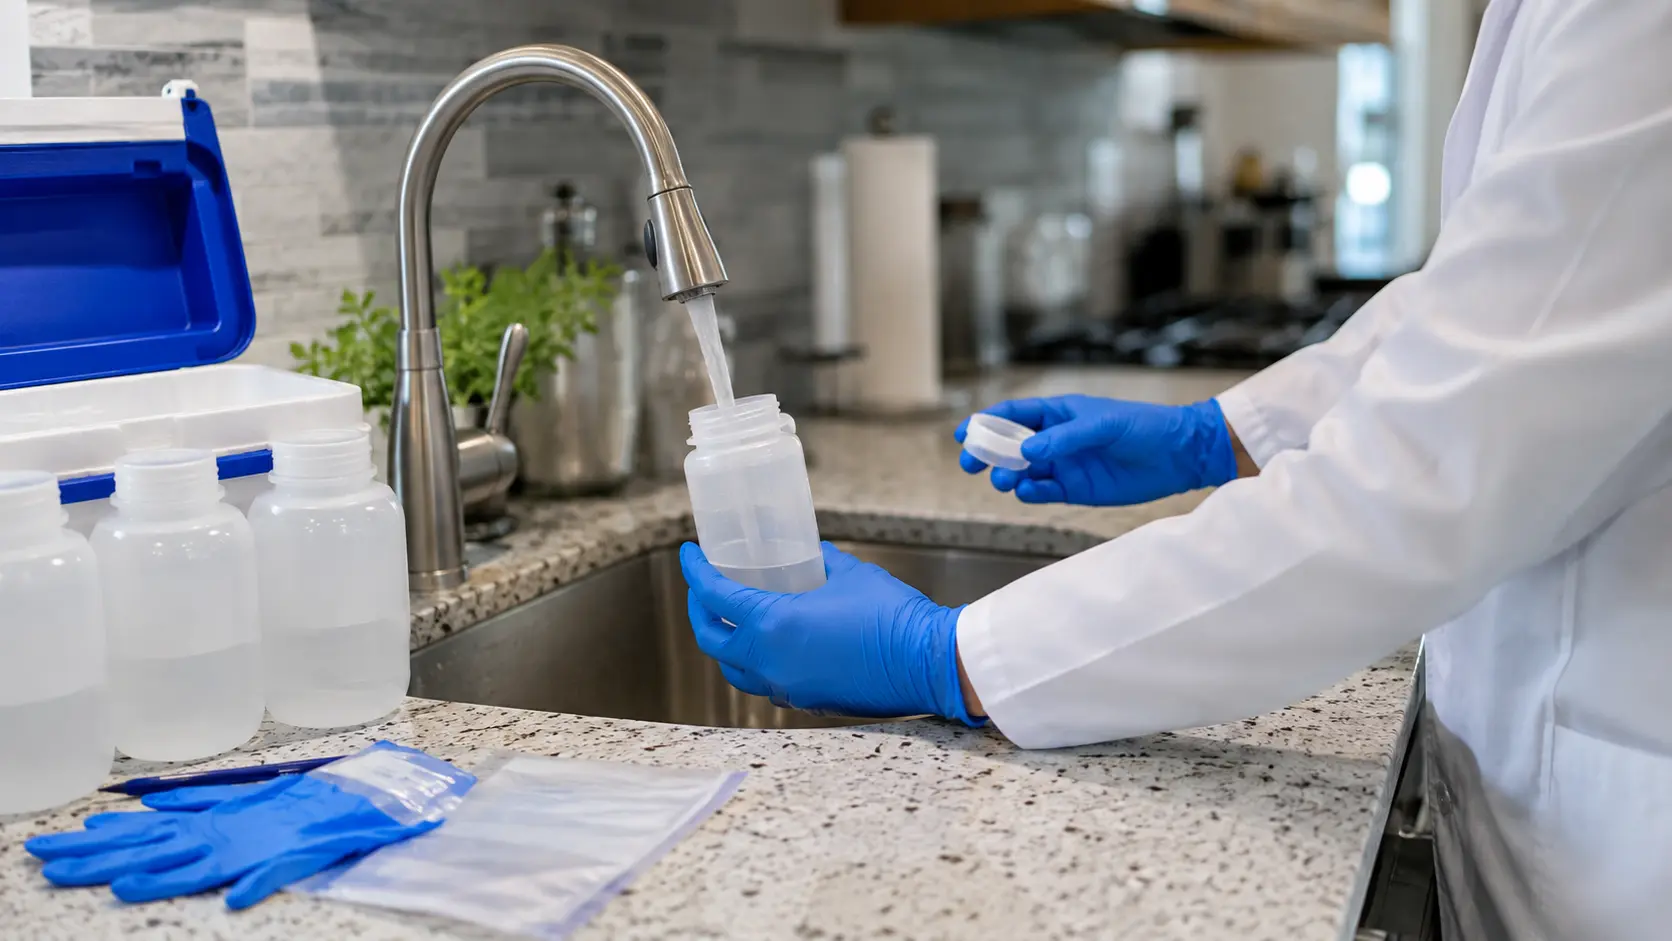
Rinse the bottle before you fill it, and the lab has to reject your sample. That’s the single most common reason a well water sample never makes it into a report, and it happens at kitchen sinks every single day. A rejected sample means a second kit, another trip to the tap, and two more weeks before you know anything about your water.
Careful water sample collection avoids nearly every mistake on this list. Each one is small, easy to make, and just as easy to avoid once you know what to watch for. Here are the mistakes a lab sees most often, in the order they actually show up, so you can catch yours before it costs you a resample.
A sample arriving warm, late, unpreserved, or missing a signature gets flagged or turned away. The lab has to tell you rather than analyze it and hope for the best. That’s not the lab being difficult. It’s the only honest option once a sample no longer represents your water.
A flagged result is actually worse than no result at all. A number with a caveat attached still gets acted on, and a decision made from bad data can cost far more than a second test ever would. Sample rejection protects you from that, even when it feels like a setback in the moment.
A rejected sample never got tested in the first place. A questionable one passed the lab’s receiving checks and got analyzed, but something during collection may have compromised it before it ever left your kitchen.
Touching a sterile bottle, sampling through a dirty aerator, or picking the wrong tap isn’t always obvious to the lab. Nothing on paper flags it. You can end up holding a number for a contaminated water sample that never actually represented your well, without anyone catching the problem along the way. That’s exactly why collection technique matters even when the lab never rejects the bottle.
The same handful of problems come up in well water sampling again and again, and they trace back to the ten minutes at the tap, not the lab bench. In more than 30 years of processing well water samples, we’ve seen every one of these more than once, and the pattern lines up closely with the field protocols USGS uses for its own groundwater sampling. Here are the ones that come up most, what each one does to your result, and the fix for each.
This is the most common error by a wide margin, and it happens since rinsing feels like the responsible thing to do. Preserved bottles hold a measured dose of acid or thiosulfate, calculated for the exact volume you’re about to add. Rinsing it out under the tap sends the whole calculation down the drain, and the lab can no longer report a valid number. Fix: fill the bottle exactly as it arrives, with nothing added or removed first.
Outside spigots, hose bibs, bathroom taps, and utility sinks each introduce their own problem. An outdoor faucet picks up dirt and insects. A bathroom tap often sits on an unused branch of pipe that doesn’t reflect what your household actually drinks. Every one of these sits downstream of different plumbing than the kitchen cold tap does, and the EPA’s own quick guide to sample collection flags several of these same taps as ones to avoid. Fix: use the kitchen cold tap unless your kit specifically says otherwise.
Aerators and screens trap sediment, biofilm, and microorganisms that can contaminate a bacteria sample even when your well itself is perfectly clean. Running the faucet longer doesn’t fix this. The debris sits inside the fixture, not in the line, so flushing more water just pushes past it. Fix: remove the aerator and prepare the tap exactly as your lab’s instructions describe before you open the sterile bottle.
Bacteria carries the tightest clock of any routine parameter, and that clock starts the moment you cap the bottle, not when the lab opens the box. Shipping day matters more than how close you live to the lab. A sample collected Friday afternoon can sit in a depot all weekend and blow past its water sample hold time before anyone even opens the box. Fix: collect Monday through Wednesday, and ship the same day you collect.
Sterile technique matters more than people expect, and this is the single biggest cause of a false positive coliform result. Skin carries bacteria of its own, and one fingertip on the rim is enough to contaminate an otherwise clean sample. A false positive isn’t a minor inconvenience either. It usually means unnecessary shock chlorination and a second test to sort out what actually happened. Fix: hold the cap by its outside edge only, and never set it down on the counter.
Contamination isn’t limited to the bottle rim. Unwashed hands, setting the cap on the counter, letting the bottle opening touch the faucet, or handling sterile components more than necessary can all introduce the same problem. Gloves don’t fix this on their own either, since a glove that touches a dirty surface carries the contamination right along with it. Specialized tests like PFAS often come with their own added handling rules, and those need to be followed to the letter. Fix: prepare everything first, handle the bottle as little as possible, and follow the kit’s specific protocol exactly.
Bacteria and lead testing ask for opposite things. Bacteria wants the line flushed first. Lead first draw wants the water sitting still in the pipes for hours before you collect. Follow the wrong rule and you still get a technically valid number, just one that answers a different question than the one you actually asked. Our sample collection guide covers the exact flush rules by parameter. Fix: check which rule applies to your specific test before you touch the tap.
Preserved bottles need a specific water-to-preservative ratio, so underfilling or overfilling both throw that ratio off. Blasting water in at full pressure causes its own problems too, since splashing can make some specialized collections harder to get right. The correct technique really does depend on the specific bottle and analyte, so your lab’s fill line and instructions always outrank general advice. Fix: use the flow rate and fill volume specified for each individual bottle.
Volatile compounds escape into any air space they can find, and that pulls your result lower than it should be. Even a bubble the size of a pea can shift the number meaningfully. This is the one step in the whole process that has zero room for a shortcut. Fix: fill the vial until the water domes above the rim, cap it through the dome, then invert it and check for a bubble.
Testing too soon after shock chlorination produces a clean-looking result on a well that isn’t actually clean yet. The chlorine itself interferes with the bacteria method, so an early sample tells you about the disinfection, not the water underneath it. Fix: wait until the chlorine residual has fully cleared, then collect your sample.
A softener, carbon filter, reverse osmosis unit, or UV lamp sitting between the well and the tap can quietly turn a contaminated well into a passing report. This is one of the easiest mistakes to make without realizing it, especially in a house you haven’t lived in long. Fix: map out every piece of equipment on the line before you decide which tap to use.
Hold time and temperature are two separate requirements, and a sample can arrive right on schedule while still having spent the trip too warm. Bacteria and other temperature-sensitive tests often need cooling the whole way, and the lab checks temperature when the sample arrives. Fix: pack the sample in its cooler with the supplied cold packs immediately after collection, and never freeze it.
An unsigned form, a missing collection time, or an unlabeled bottle can void a sample that was collected perfectly. These are the errors that sting the most, since they have nothing to do with your technique at the tap. Fix: fill out the form right there at the tap, not later in the car.
Plenty of small worries don’t actually threaten a sample, and it helps to know which ones. A slightly slow fill, a cold day outside, a short delay before you get the cooler closed, or a scuffed label rarely change anything about the result.
Knowing what genuinely doesn’t matter saves you from ordering a resample you don’t need. Save that step for the mistakes on the list above, not for cosmetic details that never touched the water itself.
If you’re unsure about a minor collection issue, call before you discard or ship anything. Whether a mistake actually matters depends on the analyte, the bottle, the preservative, the temperature, and how much time has passed, and a lab can weigh all of that in a two-minute phone call. That’s a much better use of your time than guessing and hoping for the best.
A few signals are worth watching for. A coliform positive with nothing else out of the ordinary. Hardness or metals that swing wildly from your last test. A non-detect on something you can genuinely taste or smell in the water.
None of these signals mean much on their own. What makes them readable is a testing history to compare against, so you can tell a real change in your water from a one-off collection error. For a full walkthrough of what a normal report looks like, see our guide to understanding your well water test results.
If any of this sounds like your report, our team is happy to take a look. Send us your results and we’ll tell you plainly whether it points to your water or to how it was collected.
A positive result can mean real coliform bacteria contamination in the well or the plumbing, but it can just as easily reflect contamination introduced during collection or handling. This is exactly why the CDC recommends testing every private well at least annually: a repeated positive, collected carefully the second time, deserves real investigation rather than being written off as a fluke. If the source still isn’t clear after that, sampling at a few different points in the system can help pin down whether the problem starts at the well or somewhere in the household plumbing.
Call the lab before you ship anything. A fresh bottle fixes most collection errors at little or no added cost, and the lab would rather hear about a mistake now than reject the sample later.
A resample usually just means a new bottle and a second trip to the same tap, not a whole new order. Describe exactly what happened, and the lab can tell you whether it actually needs fixing or whether you’re fine to ship what you already have.
Run through this list before you start, and most of the mistakes above never happen in the first place.
Keep this alongside the checklist in our sample collection guide, and run through both before your next kit goes out.
Two things can explain it: a genuine, ongoing contamination in the well or plumbing, or a repeated sampling error using the same flawed technique both times. The clearest way to tell them apart is having someone else collect the third sample. If it comes back positive too, the problem is almost certainly real.
No. The preservative inside is spent once it’s been opened, and any sterility the bottle had is gone the moment the cap comes off. Labs supply fresh bottles for exactly this reason, so always start each sample with a new one.
It depends on the parameter. Bacteria and other temperature-sensitive tests are affected quickly, while most metals hold up fine at room temperature. Labs generally check the temperature on receipt and flag anything that arrived too warm for its specific requirement.
A resample for a suspected collection error can go out right away. A retest meant to confirm that treatment worked needs to wait until the treatment itself has finished running its full cycle first.
Yes. An accredited lab has to flag or reject a compromised sample rather than report a number it can’t stand behind. That obligation is one of the real, practical benefits of using a certified lab in the first place.
It depends on the stakes. Routine annual checks are perfectly fine to collect yourself. Closings, permits, and disputes usually call for a trained collector and a documented chain of custody instead. Our real estate transaction testing page covers when that’s required.
There’s no single hold time that covers every test. Holding times vary by parameter and method, as set out in the federal preservation and holding time table, and bacteria and a handful of other analyses are especially time-sensitive. Record your collection time accurately, and plan your collection around the lab’s receiving schedule rather than the other way around.
For routine testing, pick a day when the sample can reach the lab within its hold time, ideally avoiding weekends and holidays unless the lab has confirmed it’s receiving samples then. Testing after flooding, a well repair, or a sudden change in taste or odor is a different situation, and it may call for its own specific collection instructions.
Running through this checklist takes about two minutes at the tap. Skipping it is what turns one kit into two, and a few days’ wait into a few weeks. That’s the entire trade you’re making every time you sample.
If a result already looks strange, or you’re not sure whether something you did during collection matters, call ETR Laboratories and walk through it with us before you act on the number. If you’re gearing up to sample for the first time, order your well water test kit, and we’ll make sure you have everything you need before you start.
A VOC kit arrives with small glass vials, a preservative
You open a water test report, or compare two test
Field studies have found turf pesticides in some groundwater beneath
Related Post.
How VOCs Are Tested in Well Water: Lab Method Explained
A VOC kit arrives with small glass vials, a preservative already inside, a no-bubble rule
Copper and Manganese: Why Some Water Tests Skip Them
You open a water test report, or compare two test kits side by side, and
Golf Course Pesticides and Your Well Water: What to Test
Field studies have found turf pesticides in some groundwater beneath golf courses, usually below health
Giardia and Cryptosporidium in Well Water: Can You Test?
After a stomach illness, a flood, or a neighbor’s warning about parasites, a passing bacteria
Uranium Water Test: The Well Test Most Owners Skip
Uranium has no color, taste, or smell, and the routine tests many well owners order
State Well Water Testing Requirements by Region: A Guide
Private well testing requirements vary by state, and your county or municipality may add rules
Inside the ETR Laboratory: How Samples Are Analyzed
Most people who order a water test never see what happens after they mail the
Home Water Filtration Systems Often Pay for Themselves. Here Is the Math.
From the Lab by ETR Laboratories Most people treat bottled water as a small household
City Water vs Well Water: Different Tests, Different Risks
City water and private well water are managed differently, so the reasons you may want
What Comes in an ETR Water Test Kit: A Full Breakdown
When your ETR Lab’s water test kit arrives, the first question is usually simple: what’s
How ETR Laboratories Tests Your Water, Step by Step
Water testing ads usually talk about the kit in your mailbox. The part that decides
Water Test Panel Guide: Basic, Premium, or Ultimate?
Ordering a water test sounds simple until you see the options. One lab sells Basic,